Biblical texts frequently condemn deities like Baal‚ Asherah‚ and Moloch‚ representing polytheistic beliefs prevalent during ancient Israel’s formative periods․
These ancient idols‚ such as the Lamassu and figures from the Oriental Institute‚ illustrate the tangible forms of worship rejected by Yahweh’s followers․
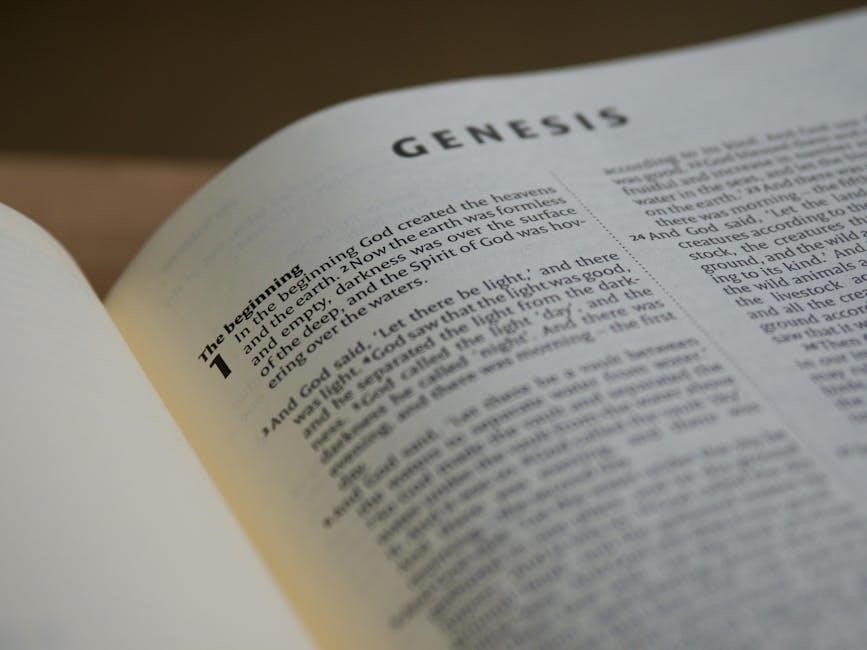
Defining Idolatry in the Hebrew Bible
Idolatry‚ within the Hebrew Bible‚ transcends simply worshipping other gods; it represents a fundamental breach of the covenant with Yahweh․ This isn’t merely polytheism‚ but a betrayal of monotheistic principles‚ viewing other deities as legitimate rivals to God’s sovereignty․
The scriptures consistently portray the creation itself as testifying to Yahweh’s power‚ rendering idols – like the gold and rusty figures at the Oriental Institute – as empty‚ manufactured representations․ These images‚ often associated with fertility or power‚ were seen as inherently false‚ lacking the divine essence of the true God․
Furthermore‚ idolatry encompassed adopting the rituals and practices associated with these false gods‚ such as child sacrifice to Moloch or the worship of Asherah through sacred poles․ The prohibition against “graven images” (Exodus 20:4-5) underscores the danger of attempting to capture the divine in a physical form‚ ultimately diminishing God’s transcendence․
The Historical Context of Polytheism in Ancient Israel
Ancient Israel existed within a profoundly polytheistic world‚ surrounded by cultures deeply invested in diverse pantheons․ Canaanite religion‚ with deities like Baal and Asherah‚ exerted a powerful influence‚ particularly before the establishment of a unified Israelite kingdom․
The archaeological record‚ exemplified by finds like the Lamassu‚ demonstrates the prevalence of idol worship in neighboring Mesopotamia and Egypt․ Israel’s neighbors believed these gods controlled natural forces and human destiny‚ offering tangible benefits in exchange for devotion․
Consequently‚ the Israelites constantly faced the temptation to syncretize their faith‚ blending Yahweh worship with elements of these surrounding religions․ This struggle is evident in biblical narratives detailing the cyclical pattern of apostasy‚ where Israel turned to false gods‚ faced judgment‚ and then repented․ The very landscape was imbued with the worship of these deities․
The Purpose of Denouncing False Gods
The biblical denunciation of false gods wasn’t merely a rejection of competing deities‚ but a fundamental assertion of Yahweh’s unique sovereignty and exclusive claim to worship․ These “gods” were seen as ultimately powerless‚ empty representations created by human hands‚ as suggested by the damaged idols observed at the Oriental Institute․
The prophets consistently condemned idolatry as spiritual adultery‚ a betrayal of the covenant relationship between Yahweh and Israel․ Worshiping other gods was perceived as a rejection of Yahweh’s deliverance from Egypt and a denial of His provision and protection․
Furthermore‚ the prohibition against graven images aimed to prevent the reduction of the transcendent God to a physical form‚ safeguarding the purity of Israelite faith and fostering a relationship based on spiritual devotion‚ not material representation․

II․ Canaanite Deities and Their Influence
Canaanite gods like Baal‚ Asherah‚ Astarte‚ and Moloch profoundly impacted Israelite religion‚ tempting them with fertility cults and rival worship practices․
Baal: The Storm God and Fertility Cult
Baal‚ a prominent deity in Canaanite religion‚ represented the storm god and was intrinsically linked to agricultural fertility․ His worship involved rituals intended to ensure plentiful harvests and reproductive success‚ appealing to a society deeply reliant on the land․
The biblical narrative consistently portrays Baal worship as a significant threat to Israel’s monotheistic faith․ Elijah’s dramatic contest on Mount Carmel (1 Kings 18) directly challenged the prophets of Baal‚ demonstrating Yahweh’s superior power over the storm god․
Archaeological discoveries‚ including depictions of Baal and associated religious iconography‚ corroborate the widespread nature of his cult․ The appeal of Baal stemmed from his perceived ability to directly influence the natural world‚ offering tangible benefits in a challenging environment․ This contrasted with the more abstract concept of Yahweh’s covenant relationship․
Asherah: The Mother Goddess and Sacred Poles
Asherah was a prominent Canaanite goddess‚ often depicted as a mother figure and consort to the chief god‚ El or Baal․ Her worship centered on fertility‚ motherhood‚ and the nurturing aspects of the divine feminine․ Archaeological evidence suggests her shrines were often located near sacred trees or poles – asherim – which served as focal points for ritual practices․
The Hebrew Bible vehemently condemns the worship of Asherah‚ frequently associating it with idolatry and sexual immorality․ References to asherim appear throughout the Old Testament‚ often in the context of warnings against syncretism – the blending of Yahwistic faith with Canaanite religious practices․
The presence of Asherah worship within Israelite religious life indicates a persistent cultural influence․ Some scholars suggest that Asherah was even worshipped within the Temple in Jerusalem at certain periods‚ highlighting the challenges faced in maintaining religious purity․
Astarte (Ishtar): Goddess of Love‚ War‚ and Fertility
Astarte‚ known as Ishtar in Mesopotamia‚ was a complex and widely venerated goddess associated with love‚ beauty‚ sexual desire‚ war‚ and fertility․ Her worship spanned across the ancient Near East‚ including Canaan‚ Phoenicia‚ and Syria․ She was often depicted as a powerful and independent figure‚ embodying both creative and destructive forces․
The Bible condemns Astarte’s worship as a dangerous deviation from monotheism‚ linking her rituals to practices considered immoral and idolatrous․ References appear in texts warning against following foreign gods and adopting their customs․
Ishtar/Astarte’s multifaceted nature made her appealing to diverse populations‚ and her influence is evident in various myths and religious traditions․ Her prominence demonstrates the pervasive religious landscape challenging Israelite faith․
Moloch: The Controversial Deity of Child Sacrifice
Moloch represents one of the most disturbing and condemned deities in the Hebrew Bible‚ notoriously associated with the horrific practice of child sacrifice․ While the exact nature of Moloch’s worship remains debated‚ biblical accounts strongly denounce offering children “through the fire” to this god․
The deity’s name and depiction are shrouded in ambiguity‚ with some scholars suggesting “Moloch” may be a title rather than a proper name․ Archaeological evidence offers limited direct confirmation of widespread child sacrifice‚ fueling ongoing scholarly discussion․
Biblical passages‚ particularly in Leviticus and Deuteronomy‚ explicitly prohibit sacrificing children to Moloch‚ portraying it as an abomination․ This practice was seen as a profound betrayal of God’s covenant and a desecration of life itself․

III․ Egyptian Gods Encountered by the Israelites
During their sojourn in Egypt‚ Israelites encountered deities like Ra‚ Osiris‚ Isis‚ and Apis‚ reflecting Egyptian polytheism and influencing their understanding of monotheism․
Ra: The Sun God and Supreme Deity
Ra‚ the ancient Egyptian sun god‚ held a paramount position in their pantheon‚ often depicted as a falcon-headed man crowned with a solar disk․ He represented creation‚ light‚ and the daily journey of the sun across the sky‚ a vital force for life and renewal․
The Israelites‚ witnessing the reverence for Ra during their time in Egypt‚ would have understood him as a powerful‚ yet ultimately false‚ deity․ Biblical texts implicitly contrast Ra’s perceived power with the absolute sovereignty of Yahweh‚ the one true God․ The Egyptians believed Ra battled the serpent Apophis each night to ensure the sun’s rebirth‚ a narrative fundamentally different from the biblical creation account․
Ra’s worship involved elaborate rituals and temple complexes‚ showcasing a complex religious system that stood in stark opposition to the simplicity of Yahweh’s covenant with Israel․ His influence permeated Egyptian society‚ highlighting the challenge faced by Israelites in maintaining their monotheistic faith․
Osiris: God of the Afterlife and Resurrection
Osiris‚ a central figure in Egyptian mythology‚ reigned as the god of the afterlife‚ the underworld‚ and resurrection; Often depicted as a mummified king wearing the atef crown‚ he symbolized rebirth and eternal life‚ concepts deeply ingrained in Egyptian beliefs about mortality․
The Israelites‚ exposed to Osiris worship during their sojourn in Egypt‚ would have recognized a stark contrast with their own understanding of death and the afterlife․ While Egyptians believed in a complex judgment process overseen by Osiris‚ the Bible emphasizes a direct accountability to Yahweh․ The promise of resurrection in the Hebrew scriptures differs significantly from the Egyptian focus on preserving the body for eternal existence․
Osiris’s cult involved elaborate funerary rituals and the construction of elaborate tombs‚ reflecting a preoccupation with death that contrasted with the biblical emphasis on living a righteous life in the present․
Isis: Goddess of Magic‚ Motherhood‚ and Protection
Isis‚ revered as a powerful goddess in ancient Egypt‚ embodied magic‚ motherhood‚ healing‚ and protection․ Often depicted with wings‚ she was considered the ideal mother and wife‚ fiercely devoted to her husband Osiris and son Horus․ Her influence extended throughout the Mediterranean world‚ attracting a devoted following;
For the Israelites‚ encountering Isis’s worship presented a challenge to their monotheistic faith․ Her role as a divine mother‚ offering comfort and protection‚ might have resonated with human desires for nurturing‚ but conflicted with the exclusive worship of Yahweh․ The biblical emphasis on God’s sovereignty and self-sufficiency contrasted sharply with the perceived dependence on a goddess for well-being․
Isis’s magical powers‚ while appealing‚ were viewed as deceptive and ultimately powerless against the one true God․
Apis: The Sacred Bull and Symbol of Fertility
Apis‚ a sacred bull worshipped in ancient Egypt‚ represented virility‚ strength‚ and fertility․ Identified by specific markings‚ the Apis bull was considered the living embodiment of the god Ptah‚ and later associated with Osiris․ Elaborate rituals and a dedicated priesthood attended to the bull‚ viewing it as a conduit to divine power and agricultural abundance․
For Israelites‚ the veneration of Apis was particularly abhorrent‚ directly violating the prohibition against animal worship․ The biblical worldview rejected the notion of divinity residing within a creature‚ emphasizing God’s transcendence and spiritual nature․ The bull’s association with fertility cults also clashed with the covenant relationship between God and Israel‚ which centered on faithfulness and obedience‚ not ritualistic practices․
The Apis cult symbolized everything the Israelites were warned against․

IV․ Mesopotamian Gods and Their Representation
Mesopotamian deities like Marduk‚ Ishtar‚ and Shamash were prominent in Babylonian and Assyrian religions‚ often depicted in imposing sculptures and reliefs․
Lamassu‚ winged bulls‚ exemplify the artistic representation of these powerful‚ yet false‚ gods․
Marduk: The Patron God of Babylon
Marduk ascended to prominence as the chief deity of Babylon‚ replacing earlier Sumerian gods like Enlil․ His rise coincided with Babylon’s political dominance‚ and the Enuma Elish‚ a Babylonian creation myth‚ details his victory over primordial forces and the establishment of order․
The biblical narrative implicitly critiques Marduk’s worship‚ aligning him with the false gods rejected by Israelites․ Babylon‚ under Nebuchadnezzar II‚ represented a significant cultural and political threat‚ and Marduk’s prominence symbolized the allure of foreign worship․ The Israelites’ monotheistic faith directly opposed the polytheistic beliefs centered around Marduk‚ viewing his veneration as a betrayal of their covenant with Yahweh․
His representation often involved a dragon‚ symbolizing chaos subdued by his power‚ a stark contrast to the divine order presented in the Hebrew Bible․
Ishtar (Inanna): Mesopotamian Counterpart to Astarte
Ishtar‚ known as Inanna in Sumerian traditions‚ was a complex Mesopotamian goddess associated with love‚ war‚ and fertility․ Her worship involved elaborate rituals and temples‚ often linked to sacred prostitution‚ practices vehemently condemned in the Hebrew Bible․
Biblical parallels identify Ishtar with Astarte‚ a Canaanite goddess similarly embodying these attributes․ The Israelites viewed Astarte/Ishtar’s worship as a dangerous temptation‚ leading to moral corruption and spiritual infidelity․ Her influence extended throughout the ancient Near East‚ posing a constant challenge to Israel’s monotheistic identity․
Representations of Ishtar often depict her with lions or other symbols of power‚ reflecting her multifaceted nature and the intensity of devotion she commanded․
Shamash: The God of Justice and Sun

Shamash‚ a prominent deity in the Mesopotamian pantheon‚ was revered as the god of justice‚ morality‚ and the sun․ He was believed to witness all events‚ ensuring fairness and upholding righteous laws‚ a concept contrasting with the perceived capriciousness of other gods․
While not directly named as a primary object of Israelite worship‚ Shamash represented a competing worldview․ The Israelites’ emphasis on a covenant-based justice system‚ mediated by Yahweh‚ differed from Shamash’s more observational role․ His solar aspect also challenged Yahweh’s unique claim to celestial power․
Shamash’s depictions often show him emanating rays of light‚ symbolizing his illuminating power and his role as a divine judge․
Dagon: Philistine God of Grain and Sea
Dagon emerges in the biblical narrative as the principal deity of the Philistines‚ a people frequently in conflict with ancient Israel․ His name likely derives from the Semitic root meaning “grain‚” suggesting an association with agricultural fertility‚ but he was also considered a god of the sea․
The story of Samson (Judges 16) features Dagon prominently‚ as Samson’s capture and blinding were celebrated with a sacrifice to Dagon․ This act symbolized the Philistines’ triumph over Israel’s champion and their deity’s perceived power․
Dagon’s worship represented a direct challenge to Yahweh’s sovereignty in the region‚ embodying a rival religious system and cultural identity․

V․ The Role of Idols and Images
The Hebrew Bible strictly prohibits “graven images‚” viewing idols as empty representations lacking true divine power‚ as exemplified by the Lamassu and figurines․
The Prohibition Against Graven Images
The Second Commandment‚ a cornerstone of biblical law‚ explicitly forbids the creation and worship of “graven images” or any likeness of things in heaven‚ earth‚ or the sea․ This prohibition isn’t merely against artistic representation‚ but against attributing divine power to fabricated forms․ The biblical text views such images as fundamentally empty‚ incapable of embodying the true God‚ Yahweh․
The discovery of ancient idols‚ like those encountered at the Oriental Institute – the Neo-Assyrian Lamassu and the smaller‚ damaged figurines – provides a tangible context for understanding this prohibition․ These objects‚ once central to religious practice‚ are presented as hollow substitutes for genuine spiritual connection․ The missing limbs and empty eye sockets of these idols subtly underscore their inherent powerlessness․
Furthermore‚ the biblical narrative suggests that the creation of idols represents a dangerous attempt to control or define the divine‚ rather than submitting to its unknowable nature․
The Symbolism of Idols as Empty Representations
Biblical authors consistently portray idols not as possessing inherent power‚ but as empty vessels reflecting human imagination and folly․ The damaged state of the idols observed at the Oriental Institute – the missing limbs‚ empty eye sockets – powerfully symbolize this emptiness․ These aren’t depictions of divine beings‚ but rather representations devoid of true life or agency․
The gold and rusty figurines‚ with their imperfect features and crumbling forms‚ suggest a failed attempt to capture the divine essence․ The hole in the fist of the standing figure‚ once meant for a weapon‚ ironically highlights the idol’s inability to defend itself or offer genuine protection․
This symbolism extends to the materials used; gold and stone‚ though valuable‚ are ultimately inert substances incapable of embodying spiritual reality․ Idols‚ therefore‚ represent a profound misdirection of worship․
Archaeological Evidence of Canaanite and Mesopotamian Idols (e․g․‚ Lamassu)
Archaeological discoveries corroborate the biblical accounts of widespread idolatry in the ancient Near East․ The Lamassu‚ a Neo-Assyrian winged bull with a human head‚ exemplifies the imposing scale and intricate craftsmanship dedicated to these false deities․ Found at sites like the Oriental Institute‚ these colossal figures guarded palace entrances‚ intended to project power and inspire awe․
Excavations in Canaan have unearthed numerous figurines representing Baal‚ Asherah‚ and Astarte‚ often found in domestic shrines and sacred groves․ These smaller idols‚ like the gold and rusty figures described‚ reveal the personal and pervasive nature of Canaanite worship․
Such finds demonstrate that the gods denounced in the Bible weren’t abstract concepts‚ but were actively venerated through tangible objects and elaborate rituals․
VI․ Biblical Narratives and the Condemnation of False Worship
Stories like the Golden Calf and Elijah’s contest with Baal’s prophets vividly illustrate the Israelites’ struggles against idolatry and Yahweh’s unwavering demand for exclusive worship․
The Golden Calf Incident (Exodus 32)
While Moses ascended Mount Sinai to receive the Ten Commandments‚ the Israelites‚ fearing his prolonged absence‚ demanded Aaron create a god to lead them․ This led to the construction of a golden calf – a blatant imitation of Egyptian bull deities like Apis‚ symbolizing fertility and power․
This act of worship‚ occurring while Moses was receiving divine law‚ represented a profound breach of the covenant with Yahweh․ The calf wasn’t worshiped as Yahweh‚ but as a visible representation‚ a tangible idol to accompany them․
Moses’s furious response upon descending the mountain‚ shattering the tablets and enacting judgment‚ underscores the severity of idolatry․ The incident highlights the Israelites’ susceptibility to adopting foreign religious practices and the dangers of seeking a physical representation of the divine‚ mirroring concerns about the Lamassu and other ancient idols․
Elijah’s Contest with the Prophets of Baal (1 Kings 18)
During King Ahab’s reign‚ the prophet Elijah challenged the 450 prophets of Baal to a dramatic contest on Mount Carmel to demonstrate the true God’s power․ Baal‚ a Canaanite storm god associated with fertility‚ was widely worshipped in Israel‚ prompting Elijah’s bold confrontation․
Both Elijah and the prophets built altars and offered sacrifices‚ appealing to their respective deities to ignite the offering with fire․ Baal’s prophets failed repeatedly‚ while Yahweh answered Elijah’s prayer with a consuming fire‚ proving His sovereignty․
This public display decisively discredited Baal worship and led to the slaughter of the prophets‚ reaffirming Yahweh’s exclusive claim to Israel’s allegiance․ The event underscores the biblical condemnation of syncretism and the importance of unwavering faith‚ contrasting sharply with the tangible idols like those found at the Oriental Institute․
Jeroboam’s Idols at Bethel and Dan (1 Kings 12)
Following the division of the kingdom‚ King Jeroboam I‚ fearing the loss of his subjects’ loyalty to Jerusalem and the temple‚ established alternative worship centers at Bethel and Dan․ He erected golden calves – one in Bethel and another in Dan – and appointed priests who were not Levites‚ directly defying God’s established order․
These calves weren’t intended to replace Yahweh‚ but to serve as accessible representations of Him‚ mirroring Canaanite practices and preventing travel to Jerusalem․ This act of religious innovation was explicitly condemned as idolatry by prophets‚ foreshadowing the kingdom’s eventual downfall․
Jeroboam’s actions demonstrate a pragmatic‚ yet ultimately flawed‚ attempt to consolidate power through religious manipulation‚ a stark contrast to the singular devotion demanded by Yahweh‚ and reminiscent of the empty eye sockets of ancient idols․

VII․ Theological Implications of Rejecting False Gods
Rejecting false gods affirms Yahweh’s unique sovereignty and the exclusive covenant relationship with Israel‚ preventing spiritual adultery and upholding divine purity․
The Uniqueness and Sovereignty of Yahweh
The biblical insistence on the absolute uniqueness of Yahweh stands in stark contrast to the polytheistic worldviews surrounding ancient Israel․ Unlike the Canaanite deities – Baal‚ Asherah‚ Astarte – or the Mesopotamian gods like Marduk and Ishtar‚ Yahweh is presented not as a god among many‚ but as the only God․
This isn’t merely a quantitative difference; it’s a qualitative one․ The idols discovered‚ like the Lamassu or the figures at the Oriental Institute‚ represent deities believed to possess limited power and localized influence․ Yahweh‚ however‚ is depicted as the creator and sustainer of all things‚ possessing ultimate authority over heaven and earth․
His sovereignty isn’t contingent on rituals or offerings‚ but stems from his inherent nature․ The condemnation of false worship isn’t simply about rejecting other gods‚ but about acknowledging the true source of power and existence – Yahweh alone․
The Covenant Relationship Between God and Israel
Central to understanding the rejection of false gods is the unique covenant relationship established between Yahweh and Israel․ This wasn’t a casual agreement‚ but a binding promise – a sacred bond demanding exclusive loyalty․ The Israelites were chosen to be Yahweh’s people‚ and in return‚ they were obligated to worship Him alone‚ forsaking all other deities․
The very act of creating idols‚ like the gold man with a missing hand observed at the Oriental Institute‚ represented a breach of this covenant․ It signified a turning away from Yahweh and an embrace of powers deemed inferior and ultimately empty․
This covenant wasn’t simply about religious practice; it shaped Israel’s identity‚ laws‚ and destiny․ Faithfulness to the covenant ensured blessing‚ while idolatry invited divine judgment‚ highlighting the seriousness of this sacred commitment․
The Consequences of Idolatry: Spiritual Adultery
Biblical authors frequently depict idolatry not merely as a theological error‚ but as a profound act of spiritual betrayal – likened to adultery․ Worshiping false gods was seen as abandoning a faithful husband‚ Yahweh‚ for fleeting and ultimately unsatisfying lovers․ This imagery powerfully conveys the depth of God’s hurt and the Israelites’ disloyalty․
The display of idols‚ like the figures at the Oriental Institute – the gold man and the muscular figurine – symbolized this broken fidelity․ They weren’t innocent objects‚ but representations of rival claimants to Israel’s devotion․
The consequences were severe‚ ranging from national defeat and exile to spiritual emptiness and moral decay․ Idolatry wasn’t just a religious offense; it poisoned the entire social and ethical fabric of Israelite society․

VIII․ Modern Interpretations and Relevance
Contemporary “false gods” manifest as materialism‚ power‚ and ambition‚ mirroring ancient idolatry’s allure; discerning true worship remains crucial for spiritual health․
“False Gods” as Metaphors for Contemporary Idols
The biblical condemnation of false gods extends beyond ancient deities‚ serving as a potent metaphor for modern idolatry․ Just as Israelites succumbed to the allure of Baal or Asherah‚ contemporary society often prioritizes substitutes for genuine faith and devotion․ These “false gods” aren’t necessarily statues or ritualistic practices‚ but rather anything that usurps the place of God in our lives․
Material possessions‚ career ambition‚ social status‚ and even political ideologies can become idols‚ demanding our time‚ energy‚ and loyalty․ The pursuit of these things‚ to the exclusion of spiritual values‚ mirrors the “spiritual adultery” warned against in scripture․ The image of the damaged idols at the Oriental Institute—the gold man with a missing hand‚ the rusty figurine—symbolizes the brokenness and emptiness inherent in placing faith in anything other than the divine․ Recognizing these contemporary idols is the first step towards reclaiming a life centered on true worship․
The Continuing Struggle Against Idolatry in Modern Society
Despite advancements in secularization‚ the struggle against idolatry persists in modern society‚ manifesting in subtle yet pervasive ways․ The allure of instant gratification‚ fueled by consumer culture and social media‚ often leads individuals to prioritize fleeting pleasures over enduring values․ This pursuit of superficial fulfillment echoes the ancient Israelites’ attraction to Canaanite deities like Astarte‚ promising immediate satisfaction․
The constant bombardment of advertising‚ promoting material possessions as sources of happiness‚ functions as a modern form of idol worship․ Furthermore‚ the elevation of personal autonomy and self-reliance can eclipse the recognition of a higher power․ Just as the broken idols at the Oriental Institute represent failed promises‚ contemporary idols ultimately leave us feeling empty and unfulfilled․ Vigilance and critical self-reflection are crucial in resisting these modern forms of idolatry․
The Importance of Discerning True Worship
Discerning true worship necessitates a critical examination of one’s motivations and the objects of devotion․ The biblical narrative consistently emphasizes the uniqueness of Yahweh and the dangers of attributing divine qualities to created things․ The contrast between the empty eye sockets of the ancient idols and the living God highlights the futility of seeking fulfillment in false representations․
True worship‚ as depicted in scripture‚ involves a genuine relationship with the divine‚ characterized by humility‚ obedience‚ and a commitment to justice․ It’s a rejection of self-centered desires and an embrace of God’s will․ Recognizing the subtle ways idolatry manifests – whether through material possessions‚ power‚ or self-importance – is vital․ This discernment allows for a return to authentic faith and a life centered on the true God․